If you have a small number of students to enroll, you can use the “Create a student” function in the Users tab of your teacher dashboard. Click on the Classes tab or Users tab and follow these steps:
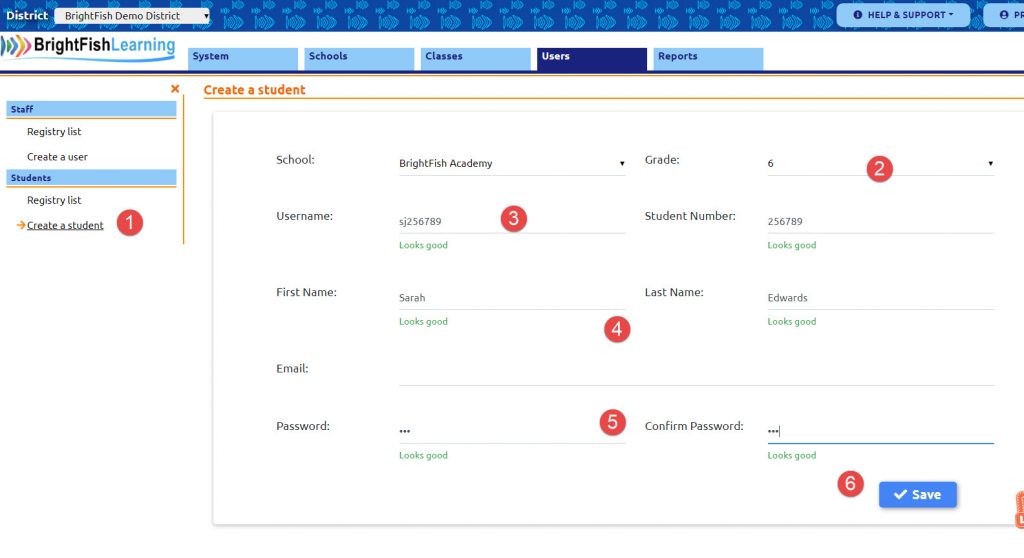
Step 1: On the left sidebar menu, click on “Create a student.” This will bring up a dialog box to add your student.
Step 2: Select a grade level for the student.
Step 3: Assign a username. The username should be a minimum of 6 characters. To ensure a unique ID, use letters and numbers or special characters. For example: sue.koch or johnsmith251
(The student number field is optional and can be left blank.)
Step 4: Type in the first and last name.
(The email field is optional and can be left blank.)
Step 5: Type in a password for the student and retype it to confirm. Passwords should be a minimum of three characters. For example: 3679 or john3679
Step 6. Save. Your student will now be added. (Note: if you get an error that the username already exists, check your student registry to see if the student is already enrolled. If you can’t find your student, then the username is already taken in our database. You will need to type in a different username.)
You will now see the new student in the student registry for your school. Next: Assign a student to a class.